If you have multiple physical monitors on your Windows PC, you can configure the Remote Desktop session to use 2 or more of the monitors instead of the default of only using one. You can either use the connection GUI, or you can use an .rdp file you create by following the Saving connections section of the main RDP article.
Using the connection GUI
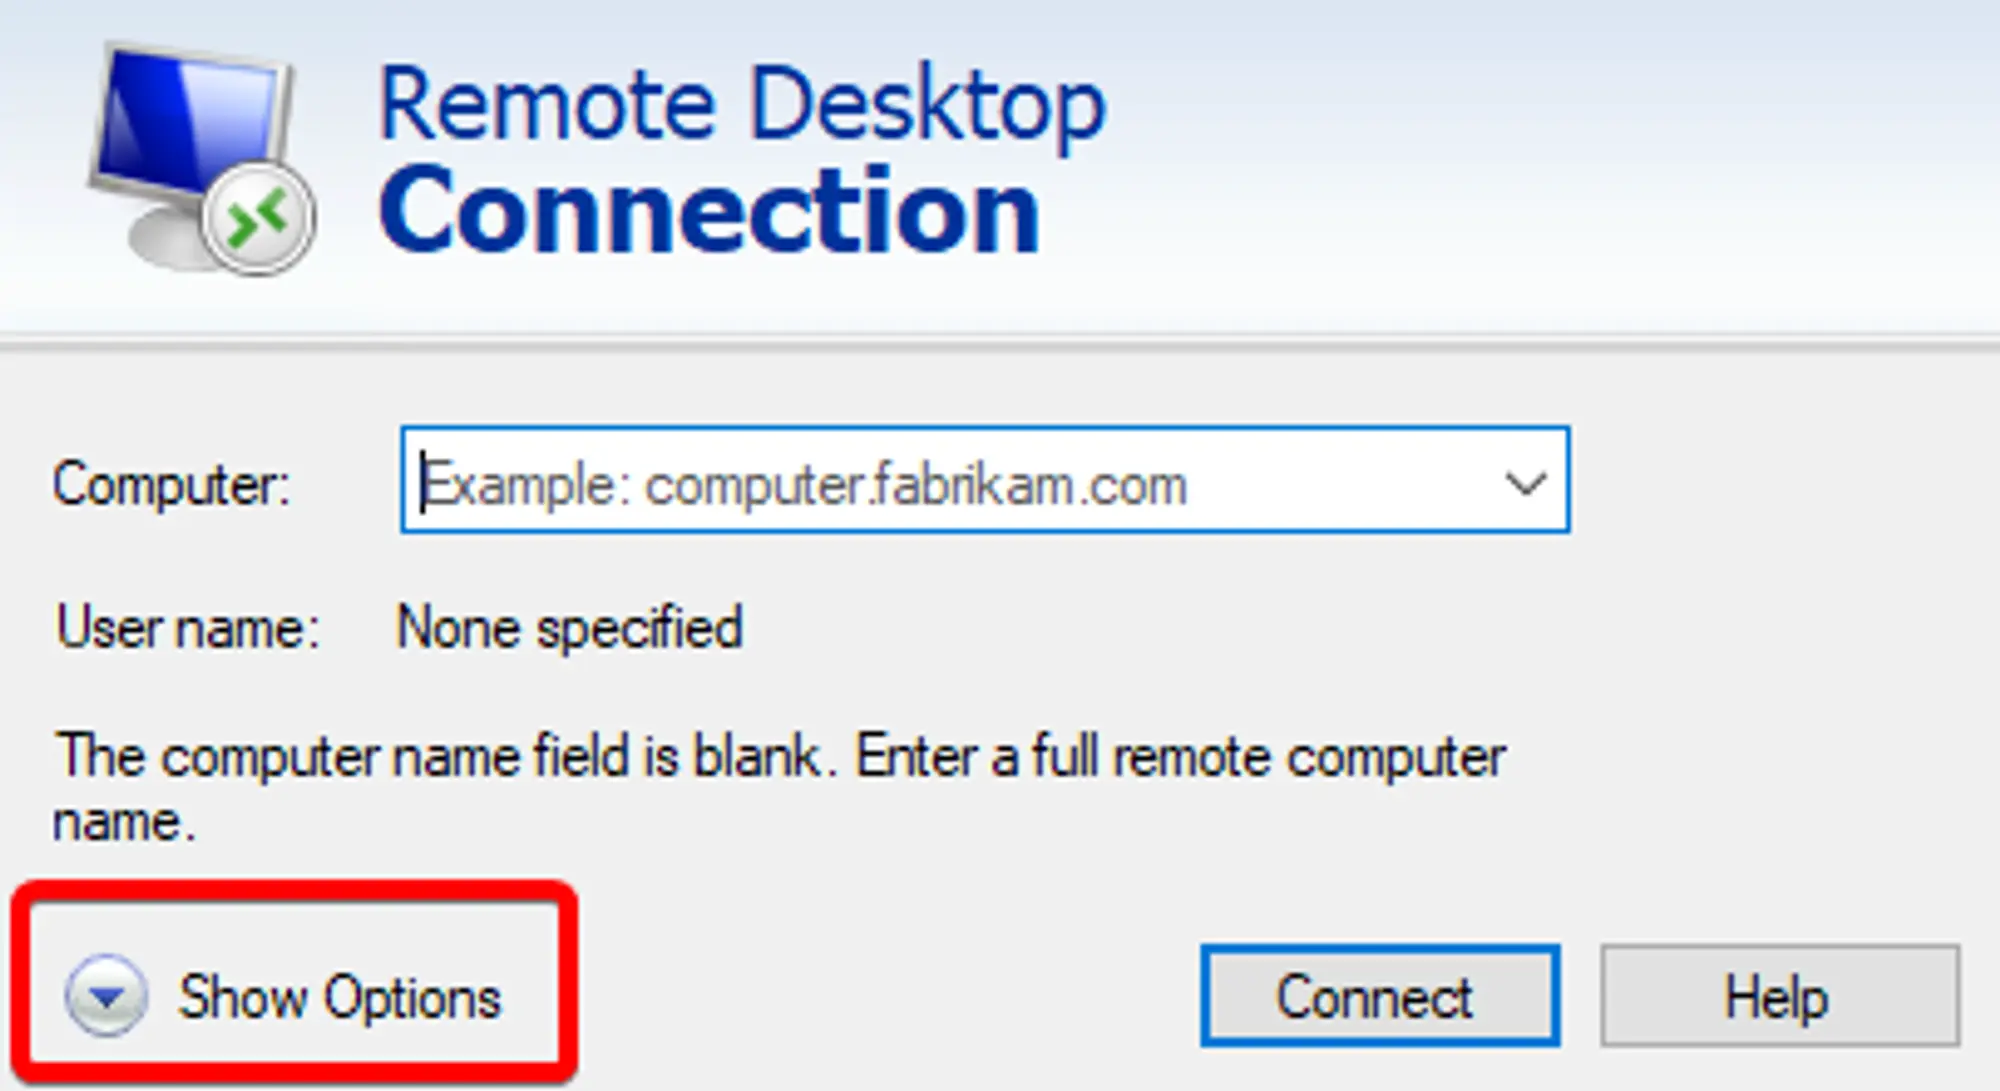
- Open the RDP Application.
Click “More Options” in the bottom right.
- Navigate to the “Display” tab.
- Check the “Use all my monitors for the remote session” check box.
Click “Connect”.
Your settings will be saved as the new default for all connections. If you’d like to only use some of your monitors, or use different settings for different connections, check out the section on
.rdpfiles and the .rdp method below on using.rdpfiles to change monitor settings.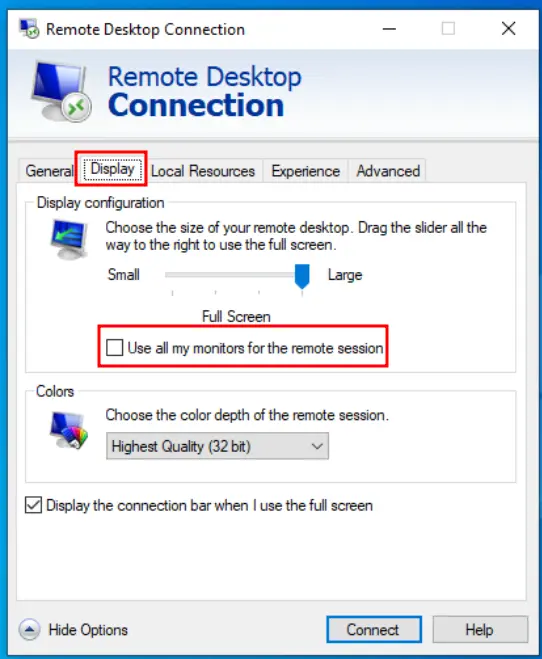
Using an .rdp file
If you want to use a subset of your monitors and/or already have an .rdp file you use to connect to your Windows server, then you can add the multimon parameter to change the settings for multiple monitors over your RDP session.
- Save your connection as an
.rdpfile by following these steps. - Open the
.rdpfile in Windows Notepad Add this line to the
.rdpfile.use multimon:i:1You can find more of these property values from this table on the Microsoft Help Center.
The property should be
use multimon:i:1where1stands in fortrueand sets theuse multimonproperty.If wanted, limit the monitors used by adding this line, where each
#is the monitor ID you want to use:selectedmonitors:s:#,#This property lists the monitor IDs that will be used as remote monitors. This defaults to all of the monitors on your Windows PC, so if you don’t want to limit the monitors you use, or you only have two, you don’t need to use this option.
The monitor IDs start at 0 and go up, where 0 is your primary monitor. You can get the IDs of each of your monitors by using the command
mstsc /lin the Windows Command Prompt. When running that command, you’ll get a new window that looks similar to the one on the right, where the first column of data is the Monitor ID of each monitor, the second column is the resolution of the monitor, and the 3rd is its position relative to the larger monitor structure.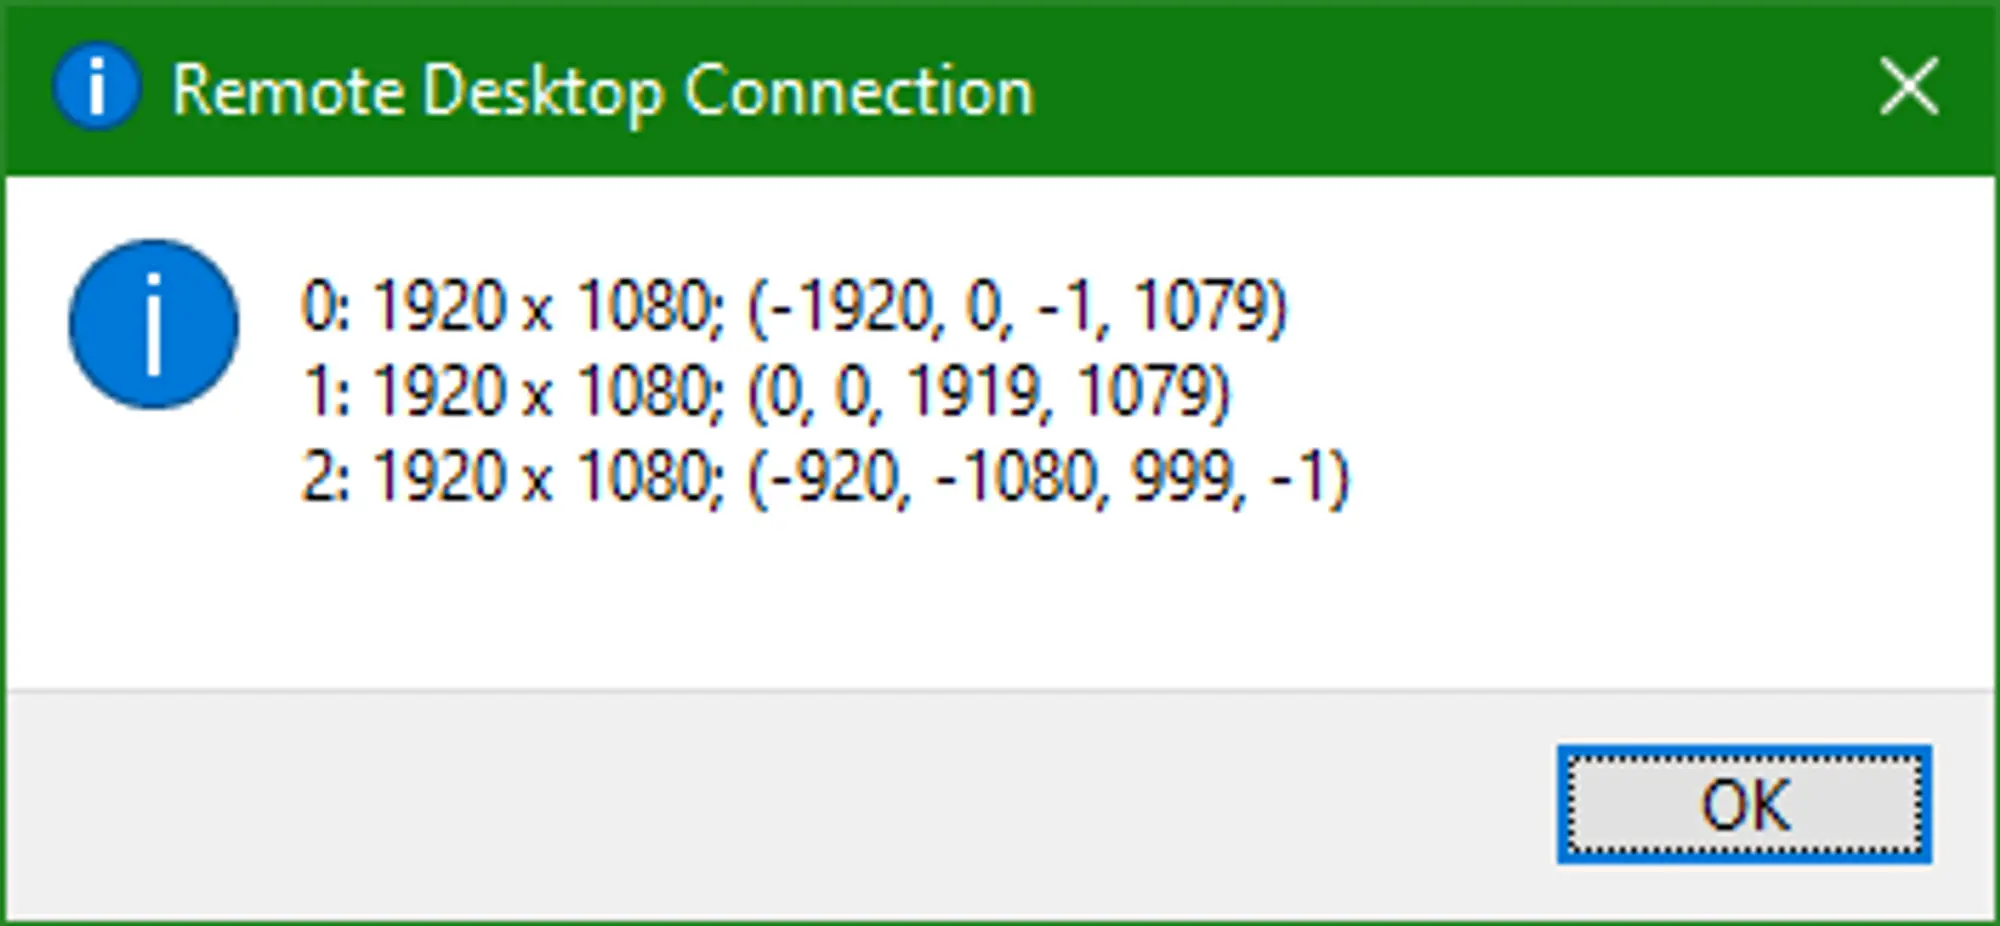
After getting the response from the command, place the IDs of the monitors you want to use in a comma separated list after the
selectedmonitors:s:property. For example, if you want to use your primary monitor and monitor1, you’d have the propertyselectedmonitors:s:0,1.If the number you entered isn’t the monitor you wanted, just try another number from the list. The exact ordering of the list can be a little ambiguous and trying again doesn’t hurt anything. Just close the session, edit/save the file, and start the session again.
More in Windows Servers
Enabling Remote Sound
How to enable and debug remote sound for your HostVenom Windows VPS over the Windows Remote Desktop client.
Error in Data Encryption
Fix the "error in data encryption" message you may see when connecting to a Windows server over RDP.
Getting Started with Your Windows Server
The first steps to take with your Windows Server at HostVenom.
Windows Remote Desktop
Using the Remote Desktop Connection application to access your Windows Server.